🤗 Transformers를 활용해 Torchserve 배포하기
들어가며
이 글은 🤗 Transformers로 모델을 Fine-tuning한 뒤 Torchserve로 배포하는 방법에 대해 소개합니다.
모델 Fine-tuning은 Huggingface 페이지 Fine-tuning turorial 예제를 활용했습니다. 이 글에서 활용할 모델에 대한 이해가 필요하다면 해당 링크를 읽어보는 것을 추천합니다. TorchServe에 대한 예제는 Serving Huggingface Transformers using TorchServe를 참고했습니다. 해당 예제에는 SequenceClassification 외에도 token_classification, question_answering, text_generation에 대한 예제도 포함하고 있으니 필요시 참고 바랍니다.
학습 & 평가 데이터 만들기
먼저 Fine-tuning에 필요한 학습, 평가 데이터를 생성하겠습니다. 이때 huggingface에서 제공하는 datasets 라이브러리를 활용하겠습니다. datasets의 load_datset을 활용하면 Huggingface에 업로드 된 Datasets을 쉽게 불러올 수 있습니다.
예제에서 활용할 yelp_review 데이터셋의 Feature는 label과 text이 있습니다. label은 레스토랑에 대한 평점을 의미하고 1~5 범위를 갖습니다. text는 평점과 함께 작성한 리뷰를 의미합니다. yelp는 한국의 다이닝코드와 유사한 서비스를 제공하는 기업입니다. 미국 내 존재하는 레스토랑의 메뉴, 운영시간, 레스토랑 평가 등 각종 정보를 확인할 수 있는 사이트를 운영하고 있습니다.
{

'label' : 4,
'text' : '"dr. goldberg offers everything i look for in a general practitioner.
            he's nice and easy to talk to without being patronizing; he's always on
            time in seeing his patients; he's affiliated with a top-notch hospital (nyu)
            which my parents have explained to me is very important in case something happens
            and you need surgery; and you can get referrals to see specialists without
            having to see him first.  really, what more do you need?
            i'm sitting here trying to think of any complaints i have about him,
            but i'm really drawing a blank."'
}
load_dataset 매서드를 활용해 yelp_review 데이터셋을 불러오겠습니다. 불러온 데이터는 DatasetDict 타입으로 제공됩니다. DatasetDict 내부에는 Dataset 타입을 담고 있습니다. DatasetDict 사용법은 일반 Dict와 동일합니다.
from datasets import load_dataset

dataset = load_dataset("yelp_review_full")

dataset

>>> DatasetDict({
    train: Dataset({
        features: ['label', 'text'],
        num_rows: 650000
    })
    test: Dataset({
        features: ['label', 'text'],
        num_rows: 50000
    })
})
DatasetDict 내부에 train Dataset을 선택해 내부 데이터를 불러오면 다음과 같은 결과를 보여줍니다.
dataset['train'][:3]


>>> {
    'label': [4, 1, 3],
    'text': [
        "dr. goldberg offers everything i look for in a general practitioner.  he's nice and easy to talk to without being patronizing; he's always on time in seeing his patients; he's affiliated with a top-notch hospital (nyu) which my parents have explained to me is very important in case something happens and you need surgery; and you can get referrals to see specialists without having to see him first.  really, what more do you need?  i'm sitting here trying to think of any complaints i have about him, but i'm really drawing a blank.",
        "Unfortunately, the frustration of being Dr. Goldberg's patient is a repeat of the experience I've had with so many other doctors in NYC -- good doctor, terrible staff.  It seems that his staff simply never answers the phone.  It usually takes 2 hours of repeated calling to get an answer.  Who has time for that or wants to deal with it?  I have run into this problem with many other doctors and I just don't get it.  You have office workers, you have patients with medical needs, why isn't anyone answering the phone?  It's incomprehensible and not work the aggravation.  It's with regret that I feel that I have to give Dr. Goldberg 2 stars.",
        "Been going to Dr. Goldberg for over 10 years. I think I was one of his 1st patients when he started at MHMG. He's been great over the years and is really all about the big picture. It is because of him, not my now former gyn Dr. Markoff, that I found out I have fibroids. He explores all options with you and is very patient and understanding. He doesn't judge and asks all the right questions. Very thorough and wants to be kept in the loop on every aspect of your medical health and your life."
        ]
    }
65,000개의 학습 데이터 중 1,000개의 데이터를 임의로 추출하고 평가용 데이터는 100개를 추출하겠습니다.
# train
train_dataset = train_dataset = dataset["train"].shuffle(seed=42).select(range(1000))

# validation
validation_dataset = dataset["test"].shuffle(seed=42).select(range(100))
데이터 추출 과정을 반복하지 않기 위해 csv 파일로 저장하겠습니다. csv로 저장하기 위해 .to_csv를 매서드를 활용합니다. dataset 내부는 pandas를 활용하므로 pandas의 .to_csv 매서드를 사용 할 수 있습니다.
train_dataset.to_csv('data/train.csv',index=False)
validation_dataset.to_csv('data/validation.csv',index=False)

# index=False : csv에 포함된 index를 저장하지 않는 기능
저장한 csv 파일을 불러오는 방법은 다음과 같습니다.
# load_dataset
data = load_dataset("csv",data_files={'train':'data/train.csv','validation':'data/test.csv'})

data

>>>DatasetDict({
   train: Dataset({
       features: ['label', 'text'],
       num_rows: 1000
  })
  validation: Dataset({
      features: ['label', 'text'],
      num_rows: 50
  })
})
🤗 Transformers의 모델 구조 이해하기(개념)
학습 & 평가에 사용 될 데이터를 저장했으니 🤗 Transformers를 활용해 모델을 Fine-tuning하는 단계로 넘어가겠습니다. 먼저 🤗 Transformers의 기본 개념에 대해서 간략하게 소개하겠습니다.
🤗 Transformers의 장점은 수행해야 하는 Task에 적합한 구조를 쉽게 불러올 수 있는 것에 있습니다. 🤗 Transformers에서 불러올 수 있는 구조는 앞으로 예제에서 활용할 Distil-Bert의 경우 MaskedLM, SequenceClassification, MultipleChoice, TokenClassification, QuestionAnswering 이 있습니다. 이러한 구조들은 BaseModel을 기반으로 하되 출력 상단(output-Layer) 구조를 변경하는 방법으로 구성되어 있습니다. 기존에 만들어진 Layer를 사용하지 않고 직접 Layer를 구성해야한다면 BaseModel을 직접 불러와 사용할 수 있습니다.

이렇게 출력 상단 구조가 다양한 이유는 Task 별로 필요한 Output 형태가 다르기 떄문입니다. 예로들어 MaskedLM 구조의 경우 input data에 존재하는 [MASK]에 들어갈 단어들의 순위를 Output으로 출력해야합니다. 반면 Sequence Classification은 문장 유형을 분류하거나 확률을 예측해야하는 구조에서 활용해야 하므로 0~1 범위의 값(Regression 모델), 또는 정수값(Classification 모델)의 Outuput이 필요할 때 사용합니다.
🤗 Transformer의 기본 구조에 대해 어느정도 파악했으니 우리가 만들어야 하는 모델이 어떠한 구조를 가져야 하는지로 주제를 좁혀보겠습니다. 우리가 만들고자 하는 모델은 레스토랑 리뷰 데이터를 Input 데이터로 활용해 평점을 예측하는 모델입니다. 모델이 반환해야 하는 Output은 평점을 의미하는 1~5의 값 중 하나가 되어야 합니다. 이러한 유형의 모델을 classification 모델이라 하며 🤗 Transformers의 SequenceClassification 구조를 불러와 구현할 수 있습니다.
SequenceClassification 구조는 다양한 유형의 모델을 생성할 수 있는 구조이므로 이에 대해서 간단히 설명하고 넘어가도록 하겠습니다. SequenceClassification은 우리가 구현하고자 하는 기능 (1~5 사이의 output을 반환하는 Classification 모델)외에도 다양한 task에 적용 할 수 있습니다. input data 구조와 SequenceClassification의 인자인 num_label 값을 어떻게 설정하느냐에 따라 Task에 필요한 구조를 생성할 수 있기 때문입니다.
먼저 input data 구조는 문장을 하나만 사용하는 구조와 문장 두 개를 하나로 연결해 사용하는 구조로 나눠집니다. Text classification 유형은 문장 하나를 input data로 활용하는 경우에 해당하며 Sentence Similarity, Q&A, Inference 유형은 문장 두 개를 연결해 input data로 활용하는 경우에 해당합니다. 이때 두 개의 문장을 구분하는 방법으로는 data 구조안에 [SEP] 토큰을 통해 구분합니다. 따라서 두 개의 문장으로 구성된 데이터는 모델 내부에서 [SEP]을 기준으로 Cross-Atteion을 통해 관계를 파악하게 됩니다. 이때 문장 간 관계 정보를 담고 있는 값은 [CLS] 토큰에 저장되므로 [CLS] embedding이 SequenceClassification의 Input data로 활용됩니다.
다음으로 num_label은 output 유형을 결정합니다. num_label = 1로 설정하면 모델은 0~1사이 범위의 Output을 제공합니다. num_label을 2 이상으로 설정하면 Softmax를 활용해 Label의 총합이 1이 되도록 Output을 제공합니다. yelp_review 데이터셋을 예로들면 label이 5개이므로 Output은 1 : 0.2, 2: 0.01, 3 : 0.5, 4: 0.19, 5: 0.1 과 같이 제공되며 확률값을 통해 Input Data에 대한 예측값이 3이라 판단하게 됩니다.

Sequenceclassification Model 학습하기(적용)
SequenceClassification 구조를 이해했으니 이제 BaseModel을 Text classification 모델로 Fine-tuning 하겠습니다.
모델이 예측해야하는 output은 5개(평점 1~5점)이므로 모델을 불러올 때 필요한 num_label을 5로 설정합니다.
Tokenizing, TrainingArguments, Trainer, Callback에 대한 설명은 ELECTRA 학습 구조 소개 및 Domain Adaptation 수행하기에서 다루고 있으니 생략하겠습니다.
from transformers import (
        DistilBertForSequenceClassification,
        DistilBertTokenizer,
        Trainer,
        TrainingArguments,
        TrainerCallback
    )
import pandas as pd

# load_dataset
data = load_dataset("csv",data_files={'train':'data/train.csv','validation':'data/test.csv'})

train_dataset = data['train']
evaluation_dataset = data['validation']

print('Complete Loading')


# Tokenizing
tokenizer = DistilBertTokenizer.from_pretrained("distilbert-base-uncased")

def tokenize_function(item):
    return tokenizer(item["text"], padding="max_length", max_length=128, truncation=True)

train = train_dataset.map(tokenize_function)
evaluation = evaluation_dataset.map(tokenize_function)

print('Complete Tokenizing')


tra_args= TrainingArguments(
num_train_epochs=1,
output_dir="test",
logging_steps=10,
# evaluation_strategy="epoch",
)

class myCallback(TrainerCallback):

    def on_log(self, args, state, control, logs=None, **kwargs):
        print(f'{state.global_step}회 진행 중 ')

# num_label = 5
model = DistilBertForSequenceClassification.from_pretrained(
"distilbert-base-uncased", num_labels=5
)

trainer = Trainer(
model=model,
args=tra_args,
train_dataset=train,
eval_dataset=evaluation,
callbacks=[myCallback]
)

trainer.train()
torchserve 생성하기
학습이 완료됐다면 학습한 모델을 서빙하는 방법을 알아보겠습니다. 🤗 Transformers 라이브러리의 내부는 pytorch를 기반으로 작성됐기 때문에 🤗 Transformers로 학습한 모델은 torchserve로 배포하는 것이 가능합니다. 모델을 torchserve로 배포하는 방법은 다음과 같습니다.
모델, 토크나이저 저장, 핸들러(Handler) 제작 ➡︎ MAR file 생성 ➡︎ torchserve로 배포
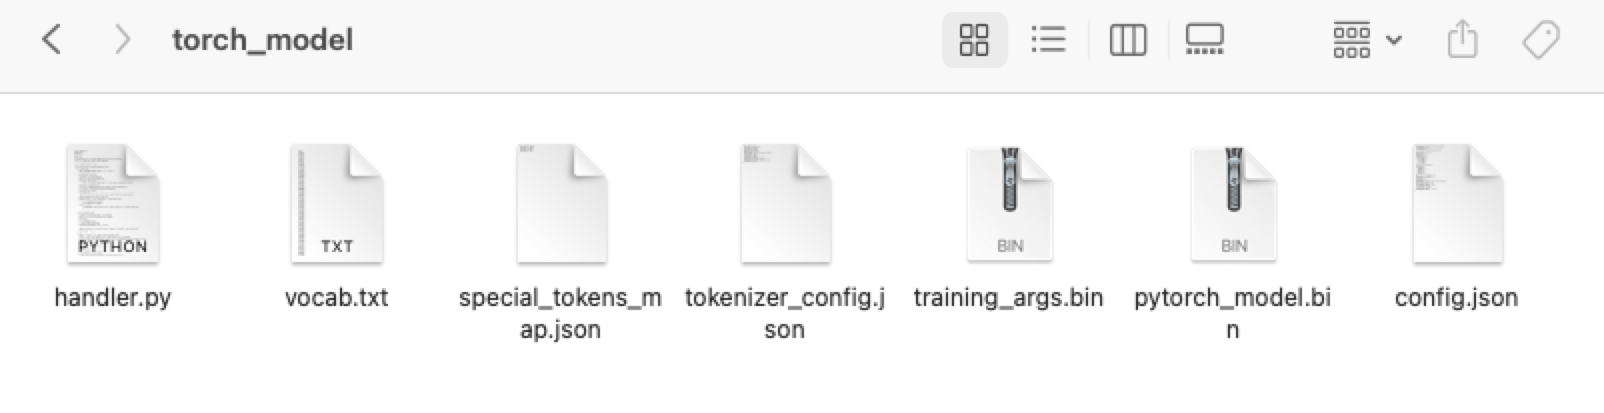
MAR file은 torch-model-archiver를 통해 생성합니다. 이를 위해선 Handler와 model, tokenzier가 필요합니다. Handler 설명에 앞서 trainer를 통해 학습한 모델과 토크나이저를 torch_model 폴더에 저장하겠습니다. 모델과 토크나이저 모두 같은 경로에 저장해주세요.
trainer.save_model('torch_model')
tokenizer.save_pretrained('torch_model')
저장 결과로 handler.py를 제외한 6개의 파일이 생성된것을 확인할 수 있습니다.
Handler가 필요한 이유
Product 환경에서는 학습용 데이터와 같이 즉시 사용 가능한 데이터를 제공 받을 수 없기 때문에 예측(Predict)에 앞서 데이터 전처리가 필히 수행되어야 합니다. 예측을 통해 얻은 결과에 대한 후처리도 필요합니다. 모델 output을 반환할 때 특정 양식에 맞춰서 반환하거나 Metric을 생성해야하기 때문입니다. 이러한 데이터 전처리 - 추론 - 후처리의 파이프라인을 구성하는데 필요한 기능을 torchserve에서는 Handler라 부릅니다.
🤗 Transformers를 위한 Handler
Handler는 BaseHandler Class를 상속받아 작성합니다. nn.Module을 사용해 모델을 제작할 때 forward를 재작성하는 것처럼, Handler 또한 BaseHandler를 불러온 뒤 preprocess, postprocess를 구성하는 방식으로 제작합니다.
🤗 Transformers를 사용했을 경우 transformers 라이브러리를 활용해 모델과 토크나이저를 불러와야 하므로 모델을 불러오는 부분인 initialize 함수도 일부 수정해야합니다. 이때 변경할 사항은 두 가지입니다. 하나는 self.model, 다른 하나는 self.tokenizer입니다. 이 외에는 BaseHandler의 구조와 동일합니다.
아래 제공한 Handlers는 기본 구조이므로 preprocess와 postprocess의 내용을 입맛에 맞게 변경하시면 됩니다. Handler Class 설정 다음에 나오는 Handle 함수는 Handler를 작동시키는 함수입니다. 잊지말고 포함해주세요.
커스터마이징 이후 handler.py를 torch_model 폴더에 함께 저장해주세요.
from abc import ABC
import json
import logging
import os

import torch
from transformers import AutoModelForSequenceClassification, AutoTokenizer

from ts.torch_handler.base_handler import BaseHandler

logger = logging.getLogger(__name__)


class TransformersClassifierHandler(BaseHandler, ABC):
    def __init__(self):
        super(TransformersClassifierHandler, self).__init__()
        self.initialized = False

    def initialize(self, ctx):
        self.manifest = ctx.manifest

        properties = ctx.system_properties
        model_dir = properties.get("model_dir")
        self.device = torch.device(
            "cuda:" + str(properties.get("gpu_id")) if torch.cuda.is_available() else "cpu"
        )

        # Read model serialize/pt file
        self.model = AutoModelForSequenceClassification.from_pretrained(model_dir)
        self.tokenizer = AutoTokenizer.from_pretrained(model_dir)

        self.model.to(self.device)
        self.model.eval()

        logger.debug("Transformer model from path {0} loaded successfully".format(model_dir))

        # Read the mapping file, index to object name
        mapping_file_path = os.path.join(model_dir, "index_to_name.json")

        if os.path.isfile(mapping_file_path):
            with open(mapping_file_path) as f:
                self.mapping = json.load(f)
        else:
            logger.warning(
                "Missing the index_to_name.json file. Inference output will not include class name."
            )

        self.initialized = True

    def preprocess(self, data):
        """Very basic preprocessing code - only tokenizes.
        Extend with your own preprocessing steps as needed.
        """
        print("------- input data 확인 --------")
        print(data)
        text = data[0].get("data")
        if text is None:
            text = data[0].get("body")

        logger.info("Received text: '%s'", text)

        inputs = self.tokenizer.encode_plus(text, add_special_tokens=True, return_tensors="pt")
        return inputs

    def inference(self, inputs):
        """
        Predict the class of a text using a trained transformer model.
        """
        # NOTE: This makes the assumption that your model expects text to be tokenized
        # with "input_ids" and "token_type_ids" - which is true for some popular transformer models, e.g. bert.
        # If your transformer model expects different tokenization, adapt this code to suit
        # its expected input format.
        inputs = inputs.to(self.device)

        prediction = self.model(**inputs)[0].argmax().item()
        logger.info("Model predicted: '%s'", prediction)

        if self.mapping:
            prediction = self.mapping[str(prediction)]
        return [prediction]

    def postprocess(self, inference_output):
        # TODO: Add any needed post-processing of the model predictions here
        logger.info("Model Name: '%s'", self.model.config._name_or_path)
        logger.info("Model predicted: '%s'", inference_output)
        return inference_output


_service = TransformersClassifierHandler()


def handle(data, context):
    try:
        if not _service.initialized:
            _service.initialize(context)

        if data is None:
            return None

        data = _service.preprocess(data)
        data = _service.inference(data)
        data = _service.postprocess(data)

        return data
    except Exception as e:
        raise e
MAR file 생성하기
이제 Mar file을 생성할 수 있는 조건이 갖춰졌습니다. model, tokenizer, handler가 동일한 경로에 있는지 다시 한 번 확인해주세요.
MAR file 생성은 커맨드에서 torch-model-archiver를 실행해 생성합니다.
torch-model-archiver 활용을 위해
pip install torchserve torch-model-archiver torch-workflow-archiver을 우선 설치해주세요
Terminal을 켜서 model, tokenizer, handler가 있는 경로로 이동합니다. 아래의 명령어를 본인이 저장한 경로에 맞게 수정해주세요. --serialized-file pytorch_model.bin, --handler "handler.py", --extra-files "config.json,vocab.txt" 이 부분을 수정해주세요.
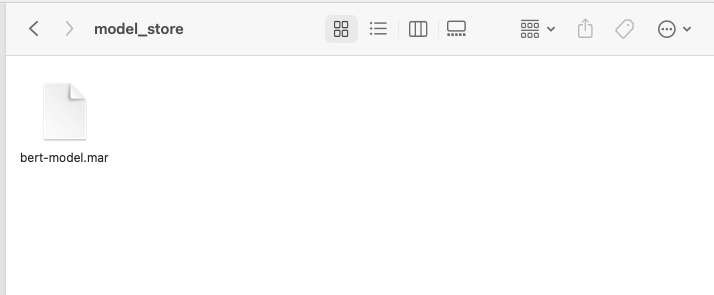
torch-model-archiver --model-name bert-model --version 1.0 --serialized-file pytorch_model.bin --handler "handler.py" --extra-files "config.json,vocab.txt"command를 실행하면 torch_model 폴더에 bert-model.mar 파일이 새로 생긴것을 확인할 수 있습니다.
MAR File의 내부구조는 args에 포함한 파일 + MAR_INF 폴더 내부에 있는 json 파일로 구성되어 있습니다.
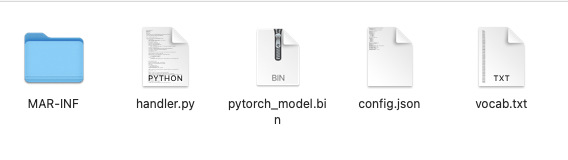
# MAR_INF 내부 Json 정보
{
    "createdOn": "17/01/2023 18:36:16",
  "runtime": "python",
  "model": {
      "modelName": "bert-model",
    "serializedFile": "pytorch_model.bin",
    "handler": "handler.py",
    "modelVersion": "1.0"
  },
  "archiverVersion": "0.7.0"
}
TorchServe 배포하기
이제 모델을 배포할 일만 남았습니다. 실행에 앞서 torch_model폴더에 model_store 폴더를 만든 뒤 bert-model.mar 파일을 내부로 이동해주세요.
아래의 명령어를 통해 Torchserve를 실행할 수 있습니다. --model-store는 폴더 경로, --models은 모델명과 MarFile을 설정합니다. 모델명(예제에서는 bert)은 API Endpoint로 활용되므로 기억해주셔야합니다.
torchserve --start --model-store model_store --models bert=bert-model.mar모델 실행 중 중 snapshot is empty로 뜨고 종료되는 경우
--no-config-snapshots을 추가로 포함해서 실행해주세요.

이제 새로운 Terminal을 띄우고 API에 접근해보겠습니다. torchserve에서 사용했던 모델명을 활용해 주소를 http://127.0.0.1:8080/predictions/모델명 으로 변경해야합니다.
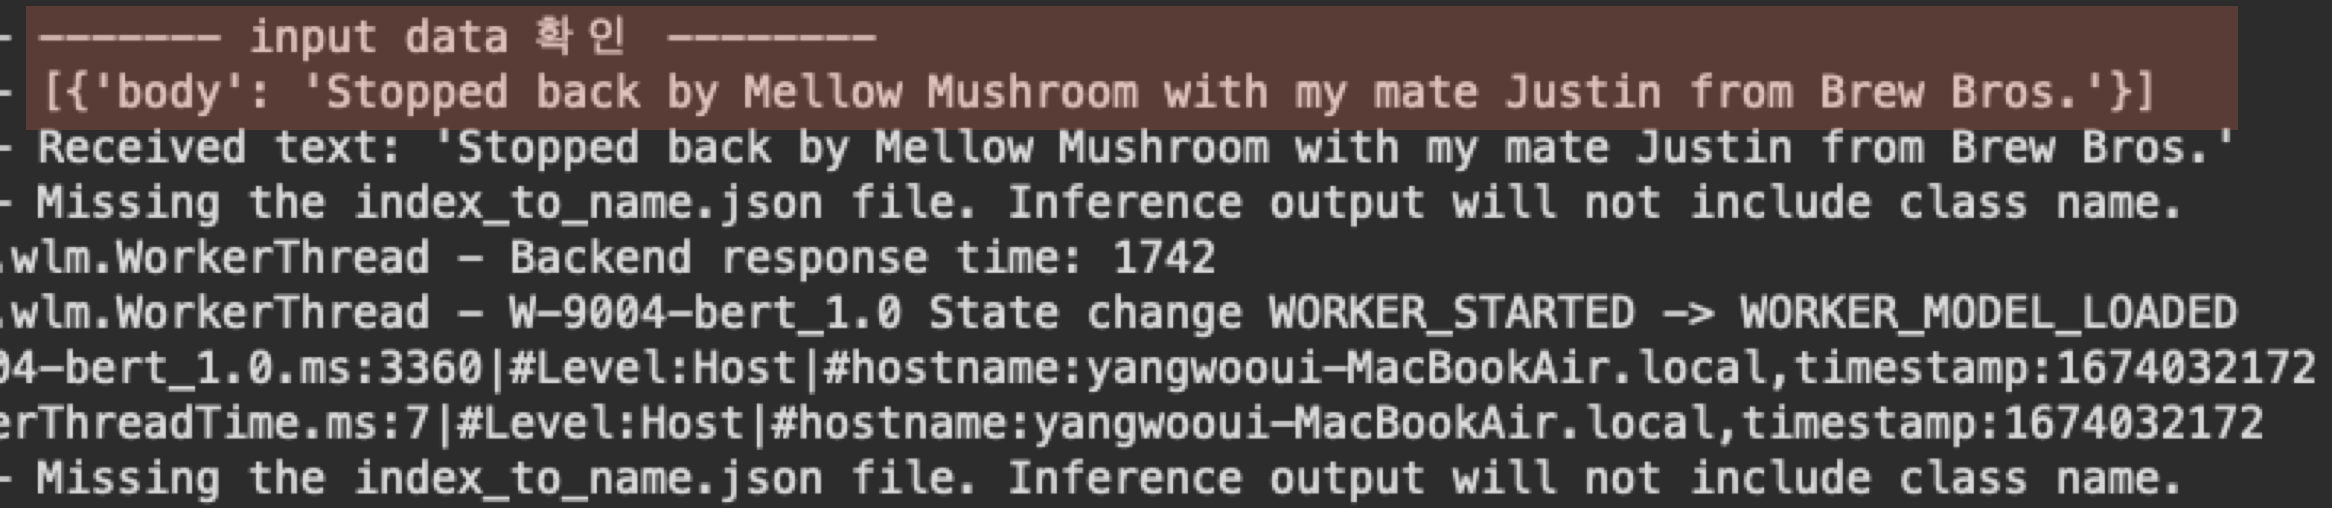
curl -X POST -H "Content-Type: text/plain"  http://127.0.0.1:8080/predictions/bert -d "Stopped back by Mellow Mushroom with my mate Justin from Brew Bros."

결과 : 2
Torchserve가 켜진 환경을 보면 이와 같이 Input data가 정확히 들어왔음을 확인할 수 있습니다.
Debugging을 위한 Shell script 생성
배포 과정에서 오류를 수정하려면 Torchserve를 종료하고, handler.py를 수정한 다음 다시 MAR file을 생성하는 반복되는 작업을 수행해야합니다.
디버깅을 편리하게 수행할 수 있도록 shell script를 활용합시다. 아래 내용을 복사해서 debug_torch.sh 파일을 생성하세요. torch-model 폴더에 넣은 다음 chmod -x 'debug_torch.sh를 실행해 권한을 변경한 뒤 debug_torch.sh를 실행하세요.
#!/bin/bash

torchserve --stop

model_name="bert-model"

# mar 만들기
torch-model-archiver --model-name ${model_name} --version 1.0 --serialized-file pytorch_model.bin  --handler "handler.py" --extra-files "config.json,vocab.txt" --force

echo 'MAR File 생성 완료'

mv -f ${model_name}.mar model_store

실행하기
torchserve --start --model-store model_store --models bert=bert-model.mar --no-config-snapshots